Introduction
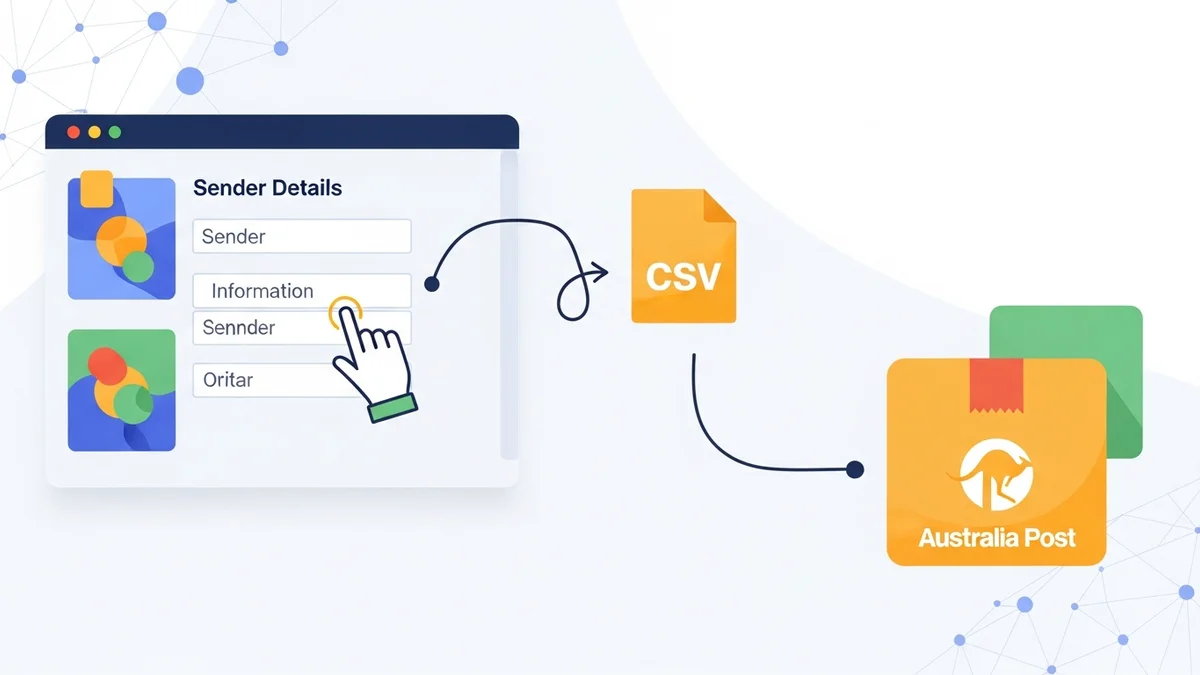
For any WooCommerce store shipping parcels through Australia Post, accurate sender details are non-negotiable. When you export your order data to a CSV file for Australia Post, this information populates the 'sender' fields on your shipping labels. Incorrect details can lead to delays, returned parcels, and a poor customer experience.
This guide will walk you through the essential steps to configure your sender information within your WooCommerce setup, specifically for Australia Post CSV export. We'll focus on how to locate and fill in these critical fields using a typical WooCommerce export plugin.
Why Correct Sender Details are Crucial for Australia Post Exports
Setting up your sender details correctly might seem like a small task, but its impact on your shipping workflow is significant. It's more than just putting your address on a label; it's about efficiency, compliance, and customer trust.
- Accurate Shipping Labels: Your sender details appear on every label. Correct information ensures Australia Post can return parcels to you if delivery fails, preventing lost inventory.
- Smooth Parcel Processing: Properly formatted data in your CSV export means fewer errors when you import to Australia Post's system. This reduces manual corrections and speeds up the label generation process.
- Professionalism and Branding: Clear, correct sender information reinforces your brand's professionalism. It shows customers you are organised and reliable.
- Compliance and Returns: Australia Post requires accurate sender details for all shipments. This information is vital for handling returns and any unforeseen shipping issues.
Prerequisites Before You Begin
Before diving into the setup, ensure you have the following in place:
- An Active WooCommerce Store: Your online store should be up and running.
- A WooCommerce Export Plugin: You'll need a plugin capable of exporting WooCommerce order data into a CSV format suitable for Australia Post. Examples include specific Australia Post shipping plugins or general advanced order export tools.
- Your Business Sender Information: Have your full business name, contact person, complete address, phone number, and email address readily available.
Step-by-Step Guide: Setting Up Sender Details
The exact location for sender details can vary slightly depending on the specific WooCommerce export plugin you are using. However, the general process involves navigating to your plugin's settings and locating the relevant fields. We'll use a common pathway as an example.
Step 1: Access Your WooCommerce Settings
First, log in to your WordPress admin dashboard. On the left-hand menu, look for "WooCommerce" and then click on "Settings."
Step 2: Locate Your Export Plugin's Settings
Within the WooCommerce settings, you might find a dedicated tab for your shipping or export plugin. This could be named something like "Shipping," "Export," "Australia Post," or the specific name of your plugin (e.g., "Advanced Order Export"). Click on this tab to access the plugin's configuration options.
If your plugin doesn't have a specific tab under WooCommerce settings, it might have its own top-level menu item in the WordPress dashboard (e.g., "Export Orders Pro"). Navigate there instead.
Step 3: Find the Sender Details Section
Once inside your plugin's settings, look for a section specifically labelled "Sender Details," "Origin Address," "Business Information," or similar. This section is where you will input your business's shipping origin information.
It might be under a general settings tab, a shipping tab, or even a dedicated export profile configuration. Scan the options carefully.
Step 4: Enter Your Business Name and Contact
You will typically find fields for your business's official name and a contact person. This information is crucial for identification on shipping labels.
- Business Name: Enter the full legal name of your business (e.g., "Your Business Name Pty Ltd" or "My Awesome Store"). This is what Australia Post will see as the sender.
- Contact Name: Provide the name of a primary contact person (e.g., "John Smith" or "Shipping Department"). This is often used for inquiries or if a signature is required upon return.
Step 5: Input Your Full Sender Address
This is arguably the most critical part. Your full physical address is required for successful parcel processing and returns.
- Address Line 1: Enter your street number and name (e.g., "123 Main Street").
- Address Line 2 (Optional): If you have an apartment, suite, unit number, or specific building name, enter it here (e.g., "Suite 4B" or "Level 2, Office 5").
- Suburb/City: Type in the suburb or city where your business is located (e.g., "Sydney").
- State: Select or enter the correct Australian state or territory (e.g., "NSW" for New South Wales, "VIC" for Victoria).
- Postcode: Enter your 4-digit Australian postcode (e.g., "2000").
- Country: Ensure "Australia" is selected as the country.
Step 6: Add Contact Phone Number and Email
These contact details are important for Australia Post to reach you regarding a shipment, especially for returns or delivery issues.
- Phone Number: Provide a reliable phone number where your business can be reached (e.g., "02 1234 5678" or "0412 345 678").
- Email Address: Enter an active email address for shipping-related communications (e.g., "shipping@myawesomestore.com.au").
Step 7: Save Your Changes
After entering all the necessary sender details, make sure to click the "Save Changes" or "Update Settings" button. Failing to save will mean your input is lost, and your CSV exports will not reflect the correct sender information.
Common Sender Detail Fields Explained
Let's briefly review why each piece of information is important for your Australia Post CSV exports.
- Business Name: Identifies your company as the sender. This appears prominently on labels.
- Contact Name: A point of contact for return deliveries or specific inquiries.
- Address Line 1 & 2: Specifies the exact physical location of your business, essential for delivery and returns.
- Suburb/City, State, Postcode: These form the geographical coordinates for Australia Post's sorting and delivery systems. Accuracy here prevents misdirection.
- Phone Number: Allows Australia Post to contact you directly if there's an issue with your parcel's delivery or return.
- Email Address: Provides an additional method for communication, often used for automated notifications or digital inquiries.
Best Practices for Managing Sender Information
Once you've set up your sender details, maintaining their accuracy is key for a smooth, ongoing shipping process.
- Always Double-Check: Before saving, review all entered information for typos or errors. Even a single incorrect digit in a postcode can cause significant delays.
- Keep Details Consistent: Ensure the sender details you enter in your WooCommerce plugin match any information you have registered directly with Australia Post's Business Portal or other shipping accounts.
- Use a Dedicated Shipping Email/Phone: Consider using a specific email address and phone number for shipping communications. This helps you manage inquiries efficiently and separates them from general customer service.
- Regularly Review and Update: If your business moves premises, changes its name, or updates contact details, remember to update these settings in your WooCommerce export plugin immediately.
- Test an Export: After initial setup, perform a test export and review the generated CSV file. Check that your sender details appear in the correct columns and format as expected.
Troubleshooting Tips
If your sender details aren't appearing correctly in your Australia Post CSV export, consider these troubleshooting steps:
- Did You Save? The most common oversight is forgetting to click "Save Changes" after inputting the data.
- Plugin Conflict: Occasionally, another plugin might interfere. Try temporarily deactivating other plugins to see if the issue resolves.
- Incorrect Field Mapping: Your export plugin might have an option to map fields. Ensure that the internal fields for sender details are correctly mapped to the desired columns in the Australia Post CSV format.
- Plugin Updates: Ensure your export plugin is updated to its latest version. Bugs are often fixed in new releases.
- Contact Plugin Support: If all else fails, reach out to the support team for your specific WooCommerce export plugin. They can provide tailored assistance.
Related Articles
Continue your learning with these related resources:
- The Complete Guide to WooCommerce Shipping for Australian Stores (Comprehensive Guide)
- How to Configure Default Shipping Service and Packaging in WooCommerce for Australia Post
- How to Customize Your Australia Post WooCommerce Export Table Columns
- How to Set Up WooCommerce Product Weights for Accurate Australia Post CSV Export
- How to Set Signature on Delivery and Extra Cover Defaults for Australia Post WooCommerce Exports
- How to Export Domestic and International WooCommerce Orders in a Single Australia Post CSV
Conclusion
Setting up your sender details correctly in WooCommerce for Australia Post CSV export is a fundamental step towards an efficient and error-free shipping operation. By following these steps and adhering to best practices, you ensure that every parcel you send is properly identified, making delivery and potential returns a seamless process. Take the time to get these details right, and you'll save yourself considerable hassle down the line.